23+ Quick Handmade Gift Ideas That Show You Care [DIY Guide]
Handmade gifts are a perfect way to show you care without spending hours crafting.
Whether it’s for a birthday, holiday, or just because, DIY gifts add a personal touch that store-bought ones can’t match. Best of all, these projects are simple, stylish, and easy to create.
![23+ Quick Handmade Gift Ideas That Show You Care [DIY Guide]](https://craftyask.com/wp-content/uploads/2025/02/23-Quick-Handmade-Gift-Ideas-That-Show-You-Care-DIY-Guide.jpg)
I’ve rounded up quick handmade gift ideas that anyone can make. From creative crafts to heartfelt keepsakes, these ideas will help you put together a meaningful present in no time!
23 Quick Handmade Gift Ideas for Every Occasion
1. Handmade Beaded Bracelet

Jewelry is a timeless gift that carries sentimental value, making it a perfect choice for any occasion. The beauty of creating your own beaded bracelet is the limitless potential for customization, allowing you to craft something truly unique and meaningful.
What You’ll Need:
- Assorted gemstone or glass beads (turquoise, ruby, amethyst, etc.)
- Gold-plated chain
- Jewelry wire
- Jump rings
- Lobster clasp
- Jewelry pliers
Let’s Get Crafting!
- Design Your Bracelet: Decide on the color scheme and bead arrangement. You can mix and match different gemstones for a vibrant, eclectic look or keep it minimal with a single color theme.
- Prepare the Beads: If using wire, cut it to the desired bracelet length, leaving extra space for the clasp. Thread your selected beads onto the wire, spacing them evenly.
- Assemble with Gold Chain: Attach sections of gold-plated chain between the beaded sections using jump rings. This adds elegance and flexibility to the design.
- Secure the Clasp: Using pliers, attach the lobster clasp to one end of the bracelet with a jump ring. Ensure all connections are tightly secured to prevent breakage.
- Finishing Touches: Check that the bracelet fits comfortably and make any necessary adjustments. You can add small decorative charms or extra beads near the clasp for a unique final touch.
Customization Tips:
- Play with Colors: Use birthstones to create a meaningful personalized gift or combine complementary shades for a bold statement piece.
- Mix Textures: Experiment with matte, polished, or faceted beads to add dimension to your design.
- Layering Magic: Make a matching set with a coordinating necklace or stackable bracelets for a cohesive jewelry look.
This handmade beaded bracelet is a thoughtful and elegant gift that suits any occasion, from birthdays to anniversaries. Plus, the personal touch makes it even more special!
2. Homemade Berry Dessert Duo
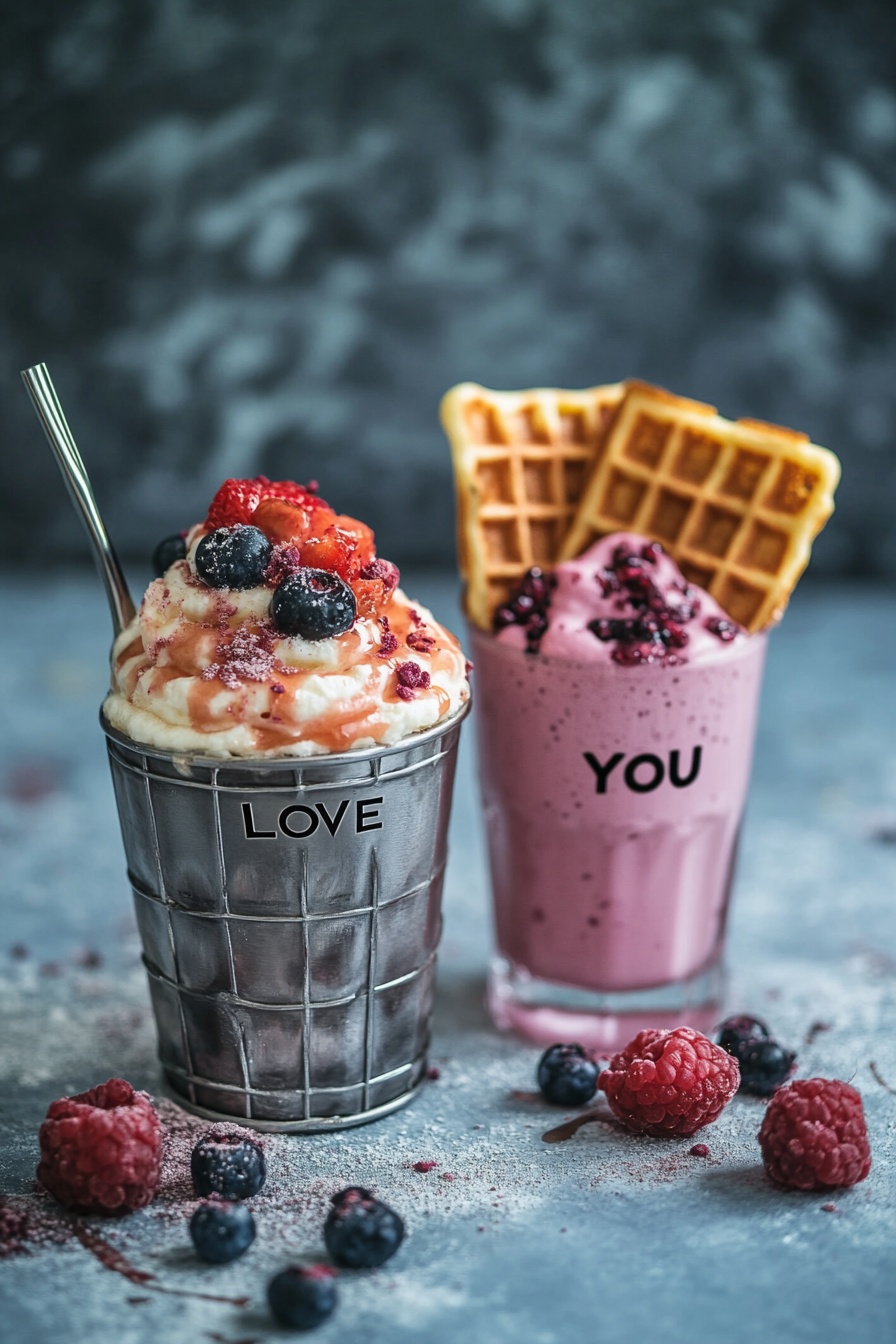
Nothing says “I appreciate you” like a homemade dessert, and this berry-infused duo is the perfect way to show you care. A creamy whipped delight paired with a rich berry smoothie makes for a fun, flavorful, and utterly delicious gift. Whether for a special someone or a surprise treat, this sweet combo is guaranteed to bring smiles!
What You’ll Need:
- Fresh berries (strawberries, raspberries, blueberries—whatever you love!)
- Whipped cream or vanilla ice cream
- Honey or berry syrup
- Greek yogurt or milk
- Crispy waffles (for the perfect garnish)
- A blender
Let’s Get Crafting!
- Whip Up the Creamy Berry Delight: Grab a metal or glass cup and layer fluffy whipped cream or vanilla ice cream with juicy berries. Drizzle on some berry syrup or honey for that extra touch of sweetness.
- Blend the Smoothie Magic: Toss your mixed berries into a blender with Greek yogurt or milk. Blend until smooth and creamy, then pour into a tall glass.
- Add That Waffle Crunch: Take two crispy waffles and slide them into the smoothie for a fun (and delicious) presentation.
- Finishing Touches: Sprinkle on extra berries, a dusting of powdered sugar, or even a drizzle of chocolate for that final wow factor!
Make It Your Own:
- Mix Up the Flavors: Try mangoes, peaches, or bananas for a fruity twist.
- Add Some Crunch: Top with granola or crushed nuts for texture.
- Personalized Touch: Serve in cute cups with a handwritten note or message on the side.
This homemade berry dessert duo is perfect for surprising a loved one, treating yourself, or just spreading a little happiness—because homemade always tastes better when it’s made with love!
3. Memory Jar
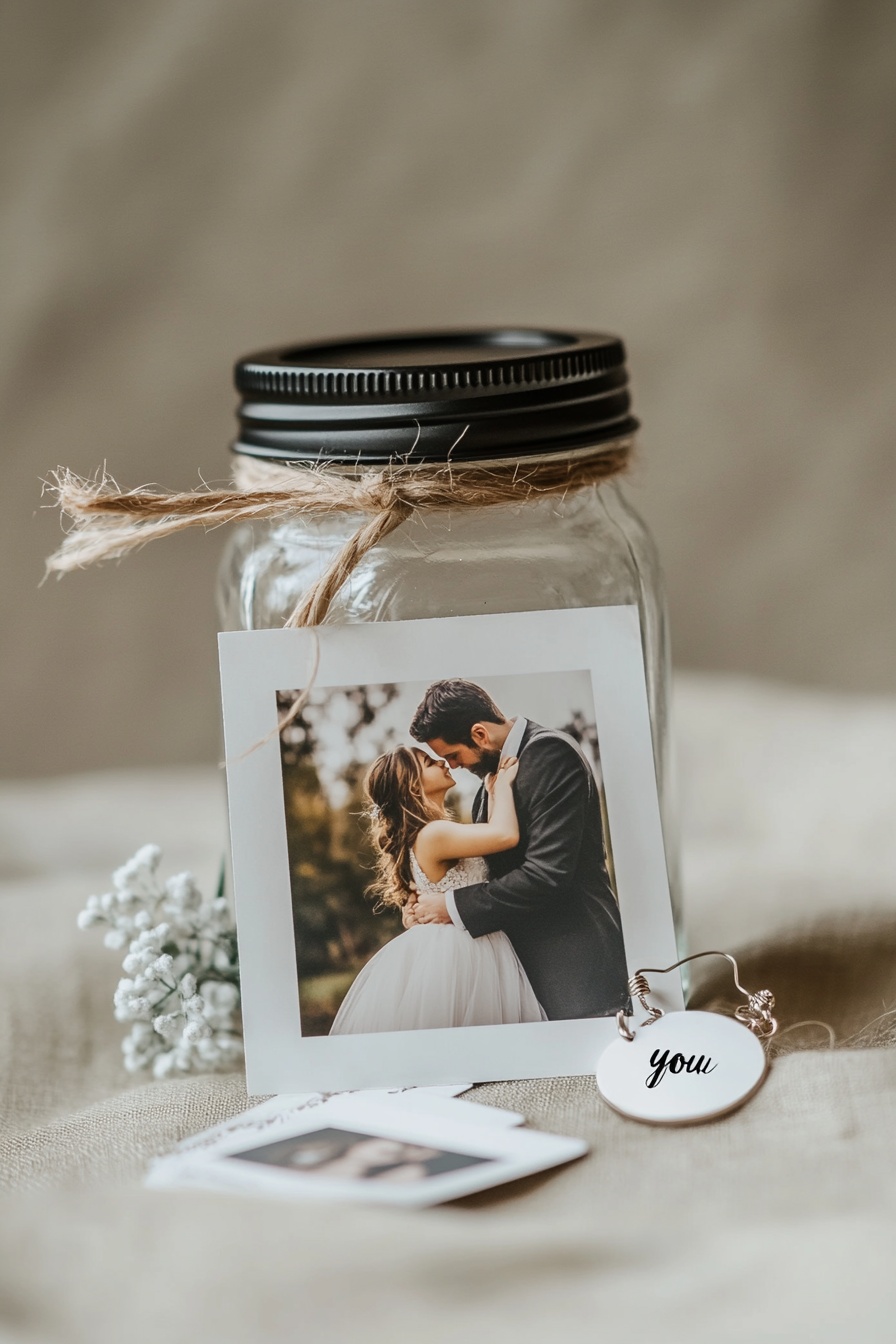
Some gifts are more than just presents—they’re keepsakes of cherished moments. A memory jar is a simple yet deeply meaningful way to capture love, joy, and shared experiences. Perfect for anniversaries, weddings, or just because, this DIY gift lets you bottle up your favorite memories in the most beautiful way.
What You’ll Need:
- A mason jar (any size)
- Twine or ribbon for decoration
- Printed photos or handwritten notes
- Small charms or keepsakes
- Decorative paper or stickers
Let’s Get Crafting!
- Choose Your Memories: Gather printed photos, handwritten notes, or meaningful keepsakes to place inside the jar. You can add love letters, inside jokes, or even song lyrics that hold special meaning.
- Decorate the Jar: Wrap twine or ribbon around the lid for a rustic touch. You can also use stickers or a small charm to personalize it further.
- Arrange the Keepsakes: Neatly place the photos inside, folding notes or stacking small mementos to create a layered effect. You can also roll up each note and tie it with a ribbon for a surprise element.
- Finishing Touches: Add a label or tag with a special message—something simple like “Our Story” or “A Jar of Us” makes it even more sentimental.
Make It Your Own:
- Go Beyond Photos: Add dried flowers, ticket stubs, or tiny objects that hold memories.
- Write a Personal Message: Include a heartfelt letter explaining the meaning behind the jar.
- Theme It: Make a “365 Days of Love” jar with a note for every day of the year.
This memory jar is a perfect way to celebrate love, friendship, or a special journey together. It’s not just a gift—it’s a time capsule of your most treasured moments!
4. Personalized Hand-Painted Mug
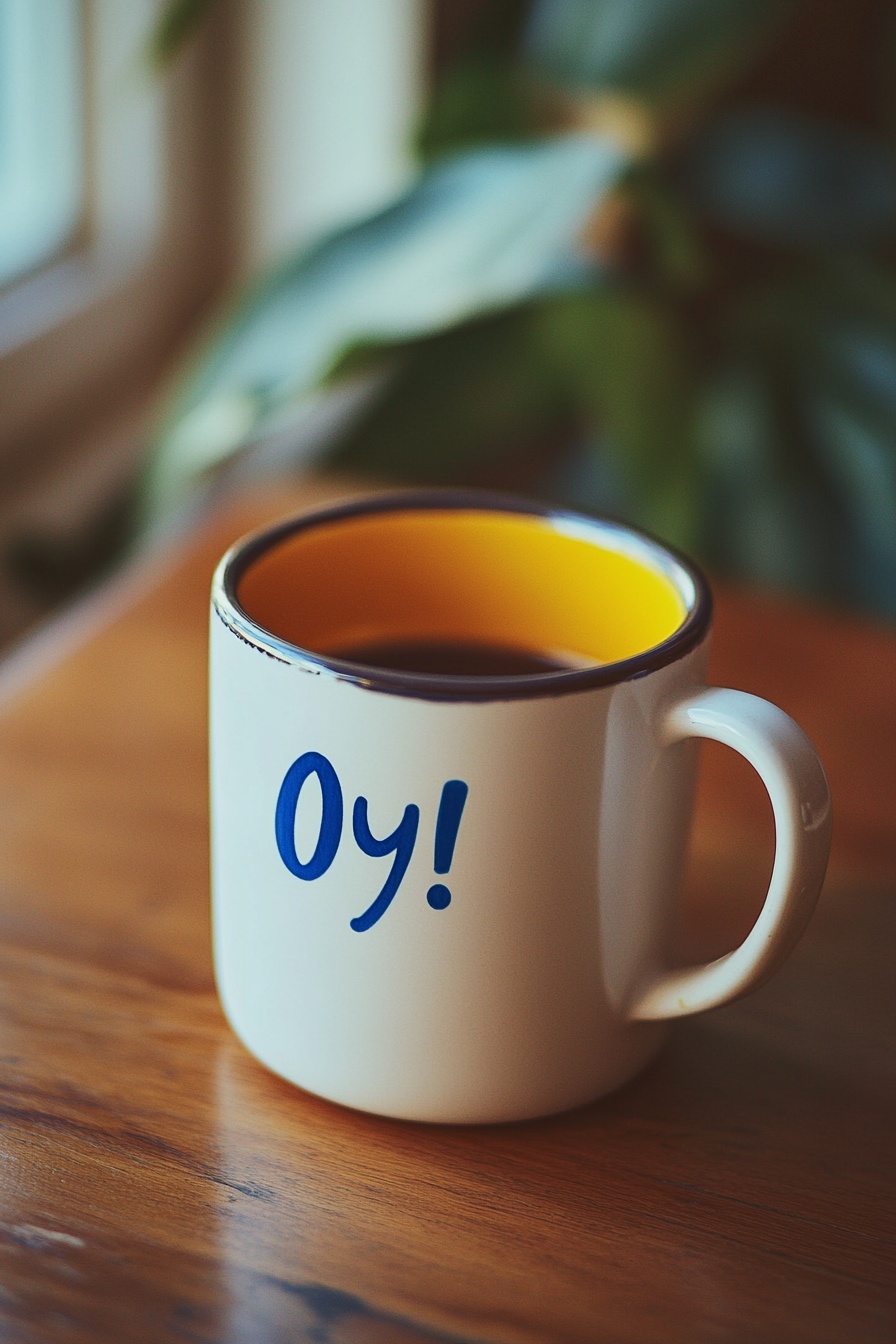
A custom mug is the perfect blend of creativity and practicality—great for coffee lovers, tea enthusiasts, or anyone who enjoys a little humor with their morning routine. Whether it’s a funny phrase, a heartfelt message, or a quirky design, a hand-painted mug adds a personal touch to every sip!
What You’ll Need:
- Plain ceramic mug (white or any light color)
- Oil-based paint markers or ceramic paint
- Rubbing alcohol and a cotton pad (for cleaning)
- Paintbrushes (if using ceramic paint)
- Oven (for setting the design)
Let’s Get Crafting!
- Prep the Mug: Clean the surface with rubbing alcohol to remove any dirt or oils. This helps the paint stick better.
- Create Your Design: Use a paint marker to write a fun word or phrase (like “Oy!”), doodle a simple illustration, or even add a name for a personal touch. If freehanding feels tricky, lightly sketch with a pencil first.
- Let It Dry: Allow the paint to dry for a few hours before moving on to the next step.
- Bake to Set the Design: Place the mug in a cold oven, set it to 350°F (175°C), and bake for 30 minutes. Let the mug cool completely inside the oven before taking it out. This step helps make the design more durable.
- Finishing Touches: Gently hand-wash before gifting, and let the recipient know to avoid dishwashers for long-lasting results.
Make It Your Own:
- Personalize It: Add inside jokes, names, or favorite quotes for a sentimental touch.
- Experiment with Colors: Try metallic gold, bold pastels, or a two-tone design.
- Go Beyond Words: Draw tiny symbols, hearts, or patterns to make the mug extra special.
A personalized hand-painted mug is an easy yet meaningful gift that turns a daily habit into a little moment of joy. Perfect for birthdays, holidays, or just because!
5. DIY Decorated Succulent Planters
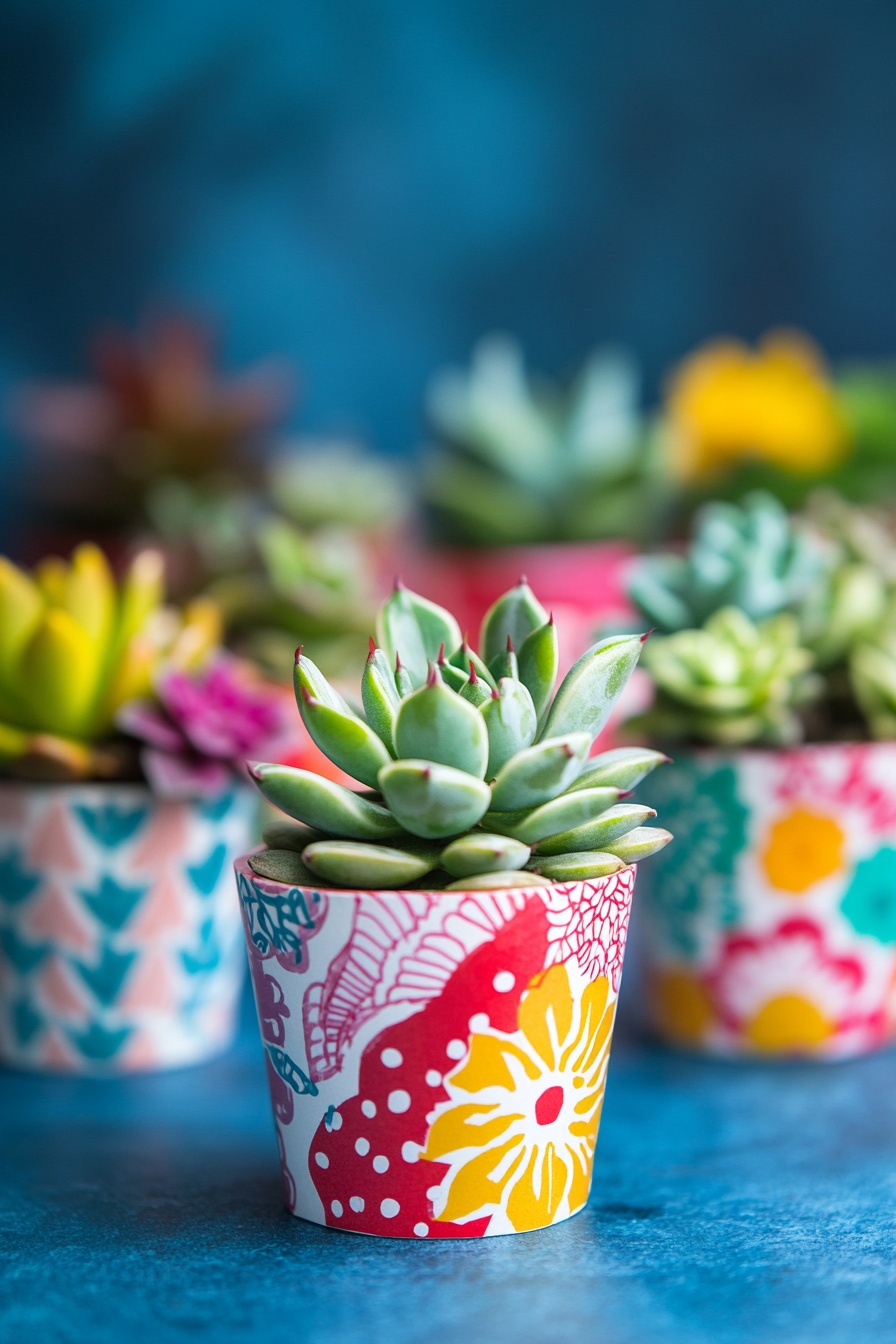
Plants make the perfect gift—they’re beautiful, easy to care for, and bring life to any space. Take it up a notch by decorating the pots yourself! These colorful succulent planters add a fun, personal touch to a classic gift, making them perfect for housewarmings, birthdays, or just to brighten someone’s day.
What You’ll Need:
- Small terracotta or ceramic pots
- Decorative wrapping paper or fabric
- Mod Podge or strong craft glue
- Paintbrush or sponge applicator
- Scissors
- Succulents or small plants
Let’s Get Crafting!
- Pick Your Pattern: Choose a fun wrapping paper or fabric with bold colors, floral prints, or geometric designs.
- Cut & Wrap: Measure and cut the paper or fabric to fit around the pot. Brush a thin layer of Mod Podge onto the surface, then carefully wrap the material around it. Smooth out any wrinkles as you go.
- Seal It In: Apply another layer of Mod Podge over the top of the paper or fabric to create a protective seal. Let it dry completely before moving on.
- Add the Plant: Once dry, fill the planter with soil and add a small succulent or plant of your choice.
- Finishing Touches: Tie a piece of twine around the top for a rustic touch, or paint the rim with gold or a matching color for extra flair.
Make It Your Own:
- Mix & Match: Create a set with different patterns and colors for a playful look.
- Go Minimalist: Use solid-colored pots and paint simple designs like polka dots or stripes.
- Personalized Touch: Write a sweet message on the pot or attach a tiny tag with care instructions.
These DIY decorated succulent planters make a charming and meaningful gift that lasts. Plus, they’re a great way to add a pop of personality to any space!
6. DIY Floral Bath Bombs

Nothing beats the gift of relaxation, and homemade bath bombs are a thoughtful way to bring a little luxury into someone’s life. With soft pastel colors and a floral touch, these DIY bath bombs make for a beautiful and soothing present—perfect for birthdays, spa days, or just because!
What You’ll Need:
- 1 cup baking soda
- ½ cup citric acid
- ½ cup Epsom salt
- ½ cup cornstarch
- 3 tbsp coconut oil (melted)
- 1 tsp water
- Essential oils (lavender, rose, or citrus)
- Natural food coloring (optional)
- Dried flower petals or small blossoms
- Bath bomb molds
Let’s Get Crafting!
- Mix the Dry Ingredients: In a large bowl, whisk together baking soda, citric acid, Epsom salt, and cornstarch until fully combined.
- Add the Wet Ingredients: In a separate small bowl, mix melted coconut oil, water, essential oils, and a few drops of natural food coloring. Slowly add this mixture to the dry ingredients, stirring constantly to prevent fizzing.
- Shape the Bath Bombs: Pack the mixture tightly into each half of a bath bomb mold, pressing in dried flower petals for an elegant touch. Press the halves together firmly and let them sit for a few minutes.
- Let Them Set: Carefully remove the bombs from the molds and place them on parchment paper. Allow them to dry for 24 hours until completely hardened.
- Finishing Touches: Wrap them in tissue paper or place them in a decorative jar for a stunning handmade gift.
Make It Your Own:
- Scent It Your Way: Try lavender for relaxation, citrus for an energizing boost, or vanilla for a warm, cozy feel.
- Add a Surprise Inside: Place dried herbs or a small note inside the bath bomb for an extra special touch.
- Personalized Packaging: Arrange them in a gift box with a handwritten tag for a spa-like presentation.
These DIY floral bath bombs are a simple yet luxurious handmade gift, perfect for anyone who loves a little self-care. Just drop one in the tub and let the relaxation begin!
7. Homemade Holiday Chocolate Bark

There’s nothing better than a homemade gift that’s both beautiful and delicious! This holiday chocolate bark is the perfect balance of rich, velvety chocolate and crunchy, festive toppings. It’s easy to make, fun to customize, and guaranteed to be a hit with anyone who receives it.
What You’ll Need:
- 2 cups dark or milk chocolate (chopped or chocolate chips)
- ½ cup mixed nuts (almonds, hazelnuts, or pecans)
- ¼ cup dried cranberries or cherries
- ¼ cup white chocolate chips (optional)
- Sea salt flakes (for extra flavor)
Let’s Get Crafting!
- Melt the Chocolate: In a microwave or using a double boiler, melt the chocolate until smooth, stirring frequently.
- Spread It Out: Pour the melted chocolate onto a parchment-lined baking sheet and spread it into an even layer.
- Add Toppings: Sprinkle mixed nuts, dried fruit, and white chocolate chips over the melted chocolate while it’s still warm. Finish with a pinch of sea salt for a gourmet touch.
- Let It Set: Place the tray in the fridge for about an hour, or until the chocolate is completely hardened.
- Break into Pieces: Once set, break the bark into rustic chunks and package it in a festive tin or clear bag with a ribbon.
Make It Your Own:
- Mix Up the Chocolate: Try a blend of dark, milk, and white chocolate for a marbled effect.
- Seasonal Twists: Add crushed candy canes for a peppermint version or drizzle with caramel for extra indulgence.
- Personalized Packaging: Wrap in a holiday tin with a handwritten tag for a thoughtful finishing touch.
This homemade holiday chocolate bark is a simple yet elegant treat, perfect for gifting at Christmas, special occasions, or just as a sweet surprise for someone you love!
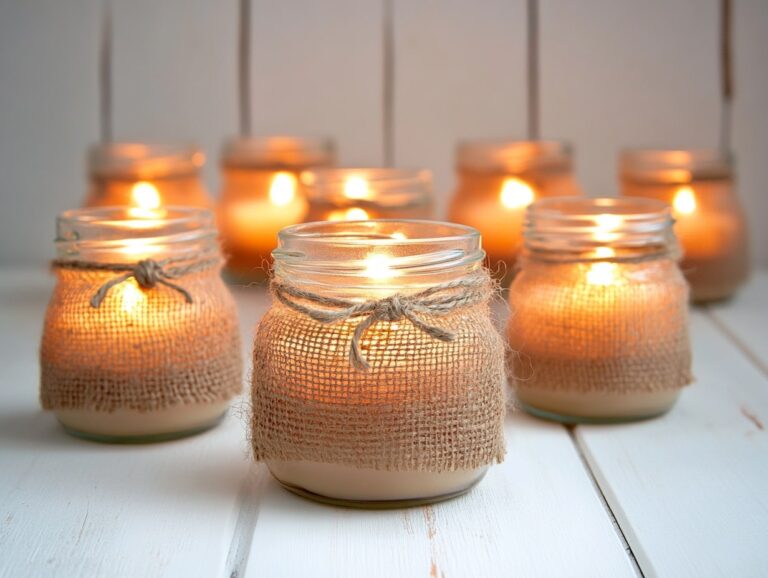
8. Hand-Poured Scented Candles
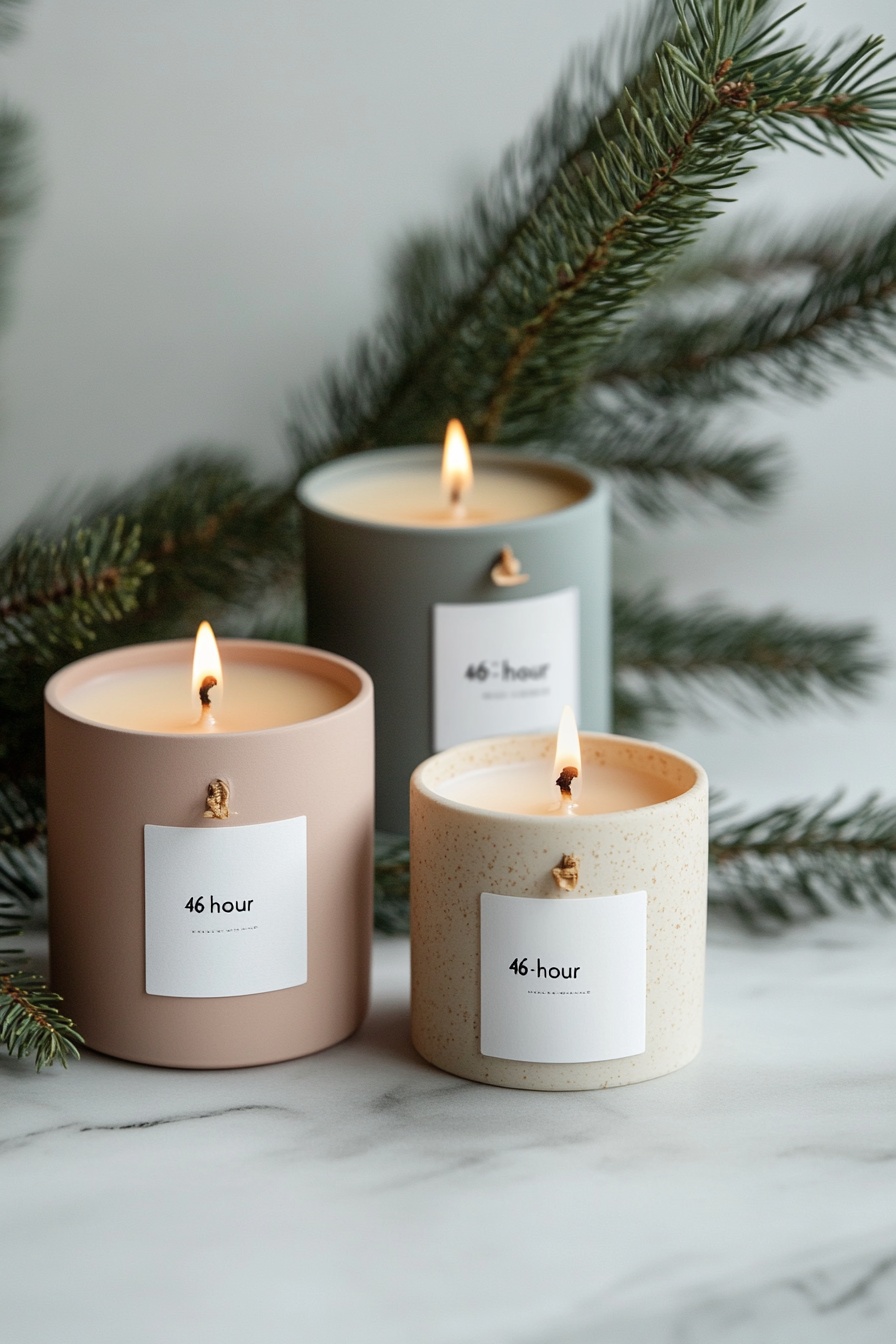
There’s something special about the warm glow and soothing aroma of a candle, especially when it’s handmade with love. These hand-poured scented candles bring comfort and elegance to any space, making them a perfect gift for the holidays, birthdays, or self-care moments.
What You’ll Need:
- 1 lb soy wax flakes
- Candle wicks (wood or cotton)
- Glass or ceramic jars
- 15–20 drops of essential oil (lavender, vanilla, cedarwood, etc.)
- Wick stickers or glue
- Wooden skewer or clothespin (to hold the wick in place)
- Double boiler or microwave-safe bowl
Let’s Get Crafting!
- Melt the Wax: Using a double boiler or microwave, melt the soy wax flakes until completely liquefied. Stir occasionally to prevent clumping.
- Add Your Scent: Once melted, remove from heat and stir in your favorite essential oils for a rich, long-lasting fragrance.
- Prepare the Jars: Secure the wick to the bottom of each jar using a wick sticker or a small dab of glue. Use a clothespin or skewer to keep it centered.
- Pour the Wax: Carefully pour the melted wax into each jar, leaving about half an inch of space at the top. Let them sit undisturbed for several hours.
- Finishing Touches: Trim the wick to about ¼ inch and add a minimalist label or handwritten tag for a beautiful presentation.
Make It Your Own:
- Customize the Scent: Mix essential oils to create signature blends like citrus-vanilla or lavender-eucalyptus.
- Personalize the Look: Use vintage teacups, concrete jars, or repurposed glass containers for a unique aesthetic.
- Gift-Ready Packaging: Wrap the candle in a linen bag or place it in a small gift box with a handwritten note.
Hand-poured scented candles make for a cozy, thoughtful gift that adds warmth and relaxation to any home. Perfect for setting the mood, unwinding after a long day, or gifting to someone special!
9. DIY Hand-Painted Coasters
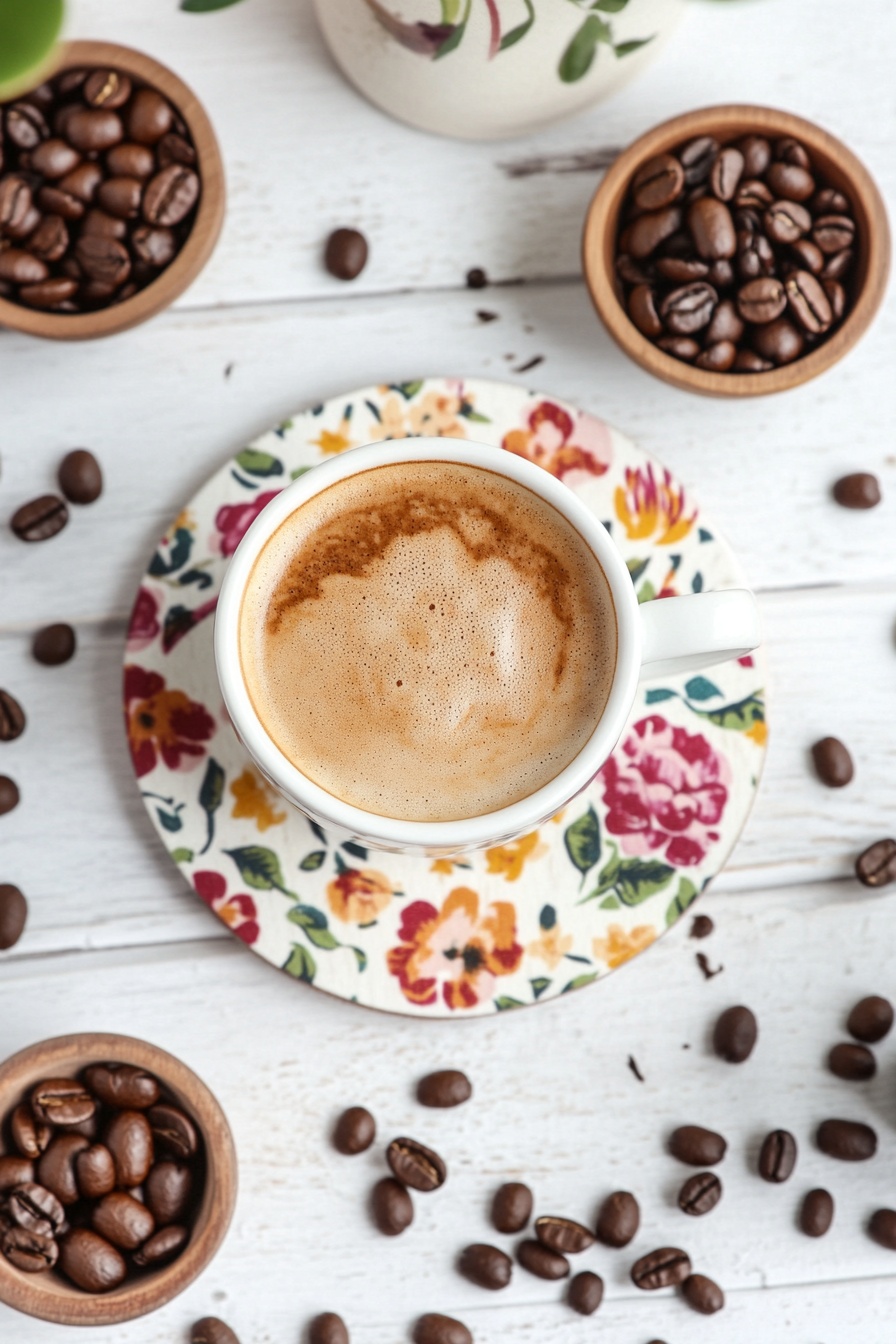
Coasters are the perfect mix of practicality and charm, making them an ideal handmade gift for coffee lovers, tea drinkers, or anyone who enjoys a stylish touch in their home. With a little creativity, you can design a set that’s completely unique and personal!
What You’ll Need:
- Plain ceramic or wooden coasters
- Acrylic paint or ceramic paint pens
- Paintbrushes or sponge applicators
- Mod Podge or clear sealant (to protect the design)
- Felt or cork backing (optional)
Let’s Get Crafting!
- Prep the Surface: Clean the coasters to remove any dust or residue. If using wooden coasters, sand them lightly for a smooth finish.
- Design Your Coasters: Use a floral pattern, geometric shapes, or even freehand lettering to create a unique design. Lightly sketch with a pencil first if needed.
- Paint & Decorate: Apply your colors with a fine brush or sponge, allowing each layer to dry before adding details. For intricate designs, use ceramic paint pens for precision.
- Seal for Protection: Once completely dry, apply a thin coat of Mod Podge or a waterproof sealant to prevent wear and tear. Let it cure for at least 24 hours.
- Finishing Touches: Attach felt or cork backing to the bottom to prevent scratches and add durability.
Make It Your Own:
- Personalized Touch: Add initials, favorite quotes, or coffee-related doodles for a fun twist.
- Mix & Match: Create a set with complementary designs or different color schemes.
- Gift It Beautifully: Stack the coasters and tie them with twine or place them in a small gift box for a polished presentation.
These DIY hand-painted coasters make a thoughtful, stylish, and functional gift that adds personality to any coffee table. Perfect for housewarmings, birthdays, or a little handmade surprise!
10. DIY Gourmet Cookie Jars
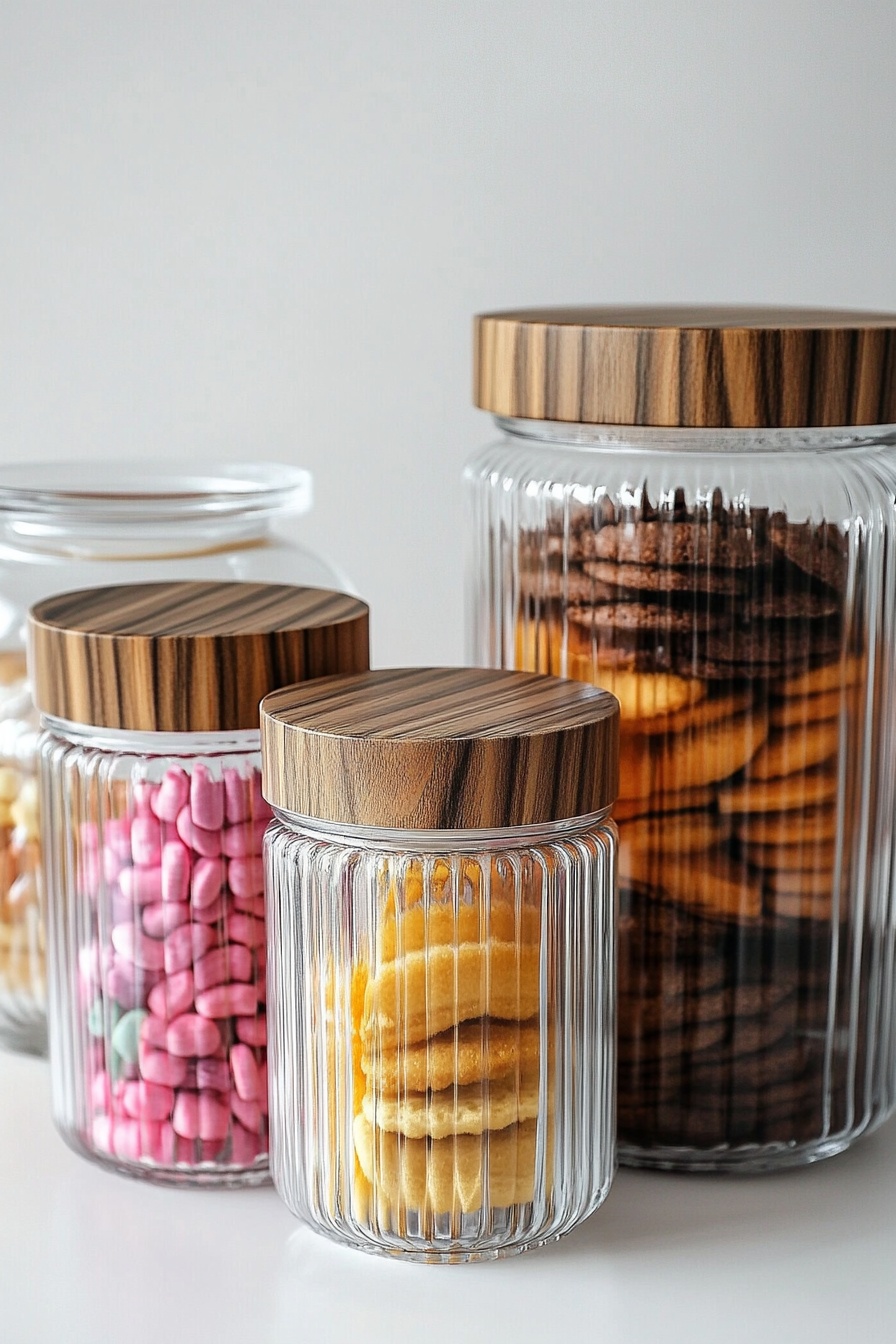
Nothing says “made with love” like a jar filled with homemade treats! These DIY gourmet cookie jars are a simple yet heartfelt gift that’s perfect for holidays, birthdays, or as a sweet surprise for someone special. Plus, they look gorgeous on any kitchen counter!
What You’ll Need:
- Glass storage jars with airtight lids
- Homemade cookies (chocolate chip, shortbread, or oatmeal)
- Candy, chocolates, or dried fruit (optional)
- Ribbon or twine for decoration
- Gift tags or labels
Let’s Get Crafting!
- Choose Your Treats: Bake a batch of your favorite homemade cookies or mix in store-bought treats for variety. If adding candy or chocolates, select ones that complement the flavors.
- Layer for a Beautiful Display: Arrange the cookies neatly in the jar, stacking them evenly for a polished look. For a fun mix, alternate between different types of cookies or add a layer of colorful candies.
- Seal & Decorate: Secure the lid tightly to keep the treats fresh. Wrap twine or ribbon around the jar for a charming touch.
- Add a Personalized Tag: Attach a small handwritten note with a message like “Homemade with Love” or include a recipe card so the recipient can recreate the treats.
Make It Your Own:
- Mix It Up: Create a variety set with different flavors in separate jars.
- Healthier Option: Fill the jar with homemade granola, dried fruits, or protein bites.
- Themed Jars: Match the colors and flavors to the occasion—holiday-themed, birthday surprises, or a cozy winter snack set.
These DIY gourmet cookie jars are a deliciously thoughtful way to share homemade goodness with friends and family. The best part? They’re as fun to make as they are to gift!
11. Hand-Painted Wooden Bookmarks
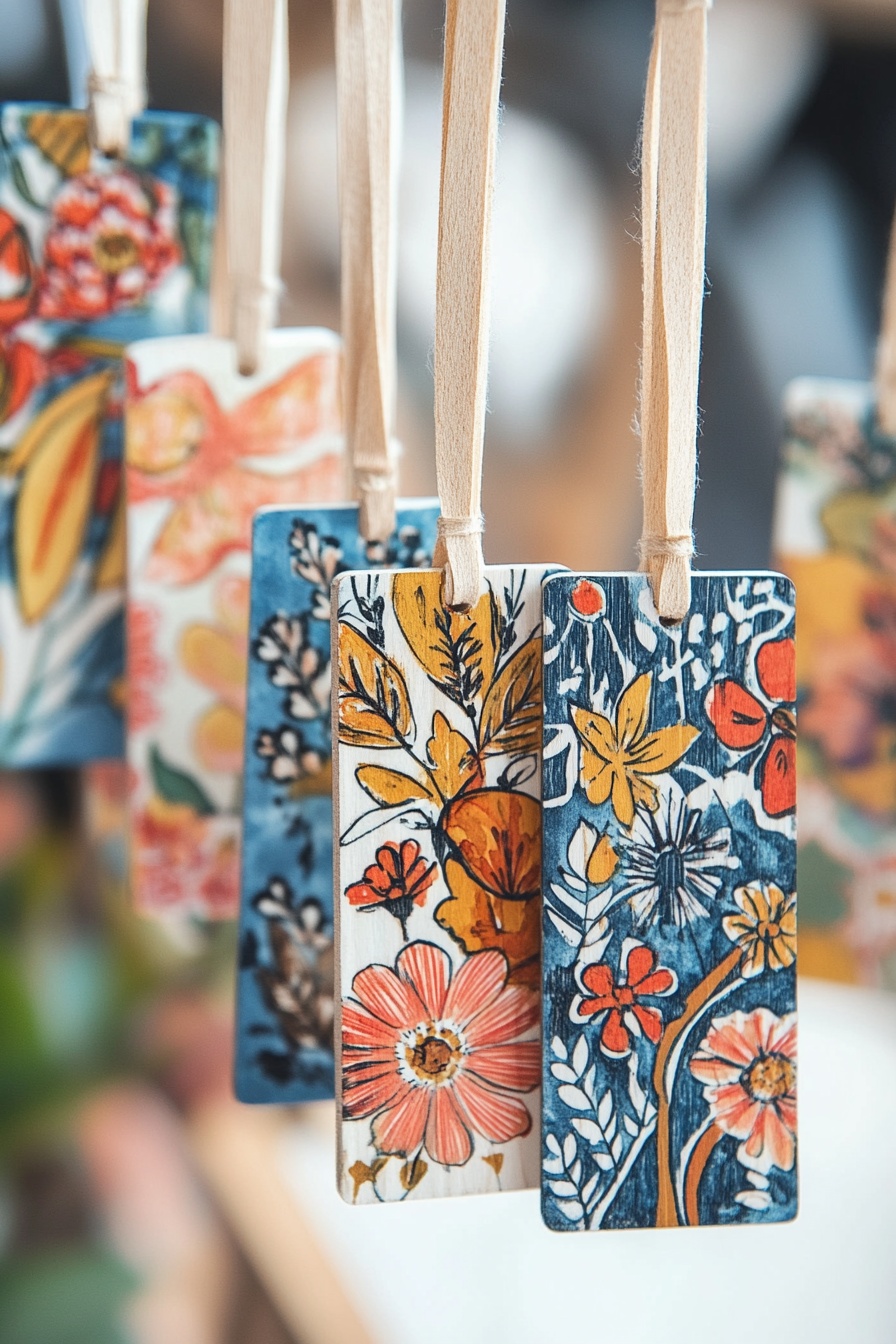
For book lovers, a beautiful bookmark is more than just a placeholder—it’s a tiny work of art that makes reading even more enjoyable. These hand-painted wooden bookmarks are a unique and thoughtful gift, perfect for birthdays, holidays, or as a charming surprise for an avid reader.
What You’ll Need:
- Thin wooden rectangles (pre-cut or craft sticks)
- Acrylic paint or watercolor paints
- Fine-tipped paintbrushes
- Mod Podge or clear sealant (to protect the design)
- Ribbon or twine for finishing touches
- Small drill (optional, for ribbon holes)
Let’s Get Crafting!
- Prep the Wood: Lightly sand the wooden pieces for a smooth painting surface, then wipe off any dust.
- Create Your Design: Sketch out floral patterns, abstract designs, or even tiny landscapes. You can also freehand for a more organic, artistic look.
- Paint & Let Dry: Use vibrant acrylic or watercolor paints to bring your design to life. Let the paint dry completely before sealing.
- Seal for Protection: Apply a coat of Mod Podge or clear sealant to make the design last longer and give it a finished look.
- Add the Final Touch: Drill a small hole at the top and thread a ribbon or twine through for a stylish accent.
Make It Your Own:
- Personalized Touch: Add initials, book quotes, or tiny doodles that reflect the recipient’s personality.
- Mix Mediums: Try decoupage by adding pieces of decorative paper or gold foil details.
- Themed Sets: Create matching bookmarks based on favorite books or seasons.
These hand-painted wooden bookmarks are a simple yet elegant gift that adds a personal and artistic touch to any reading experience. Perfect for bookworms, journal lovers, or as a handmade treat for yourself!
12. Floral Fabric Gift Set
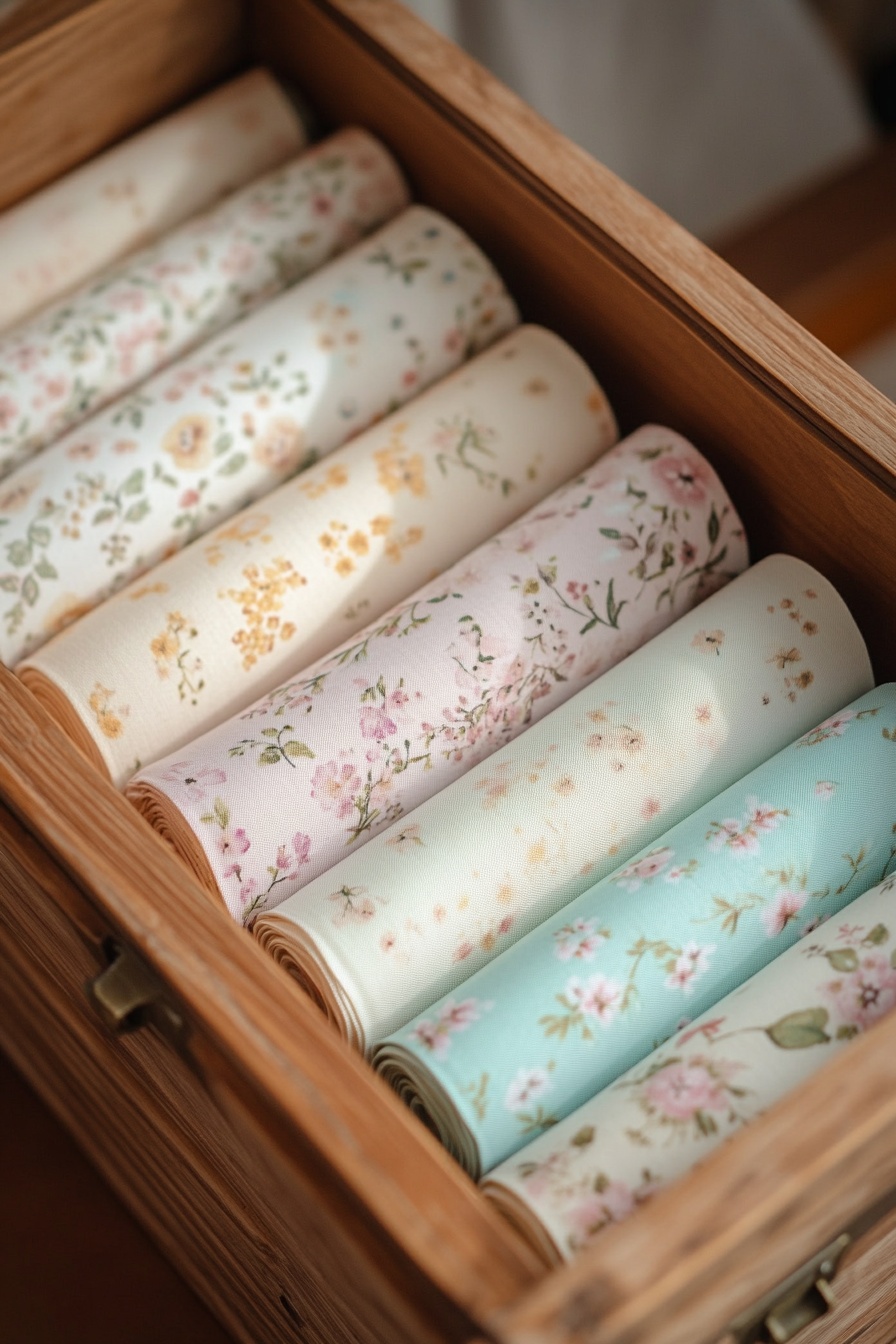
For anyone who loves sewing, crafting, or decorating, a beautifully curated fabric set is a thoughtful and inspiring gift. These delicate floral fabrics are perfect for DIY projects, from quilting to home décor, making them an elegant and versatile present.
What You’ll Need:
- A selection of floral fabric (cotton, linen, or muslin)
- A wooden storage box or decorative packaging
- Ribbon or twine for wrapping
- Handwritten tag or fabric swatch labels (optional)
Let’s Get Crafting!
- Select Your Fabrics: Choose soft pastel or vintage floral fabrics that complement each other. You can go for a cohesive color scheme or mix patterns for variety.
- Neatly Roll & Arrange: Fold or roll the fabric into uniform sizes and place them in a wooden box or decorative gift bag for a polished look.
- Add a Personal Touch: Tie the rolls with twine or ribbon and attach a handwritten tag or label indicating fabric type or project ideas.
- Presentation Matters: Arrange the fabric beautifully inside the box, making sure the patterns are visible and appealing.
Make It Your Own:
- Themed Sets: Create a spring-inspired bundle with pastel tones or a vintage set with soft, muted florals.
- DIY Kit Option: Include sewing accessories like needles, thread, and buttons for a complete beginner’s crafting kit.
- Personalized Note: Add a handwritten message with creative ideas on how to use the fabrics.
This floral fabric gift set is a unique and heartfelt present, perfect for crafters, DIY lovers, or anyone who appreciates handmade beauty. It’s not just fabric—it’s an invitation to create!
13. Homemade Gourmet Popcorn Bags
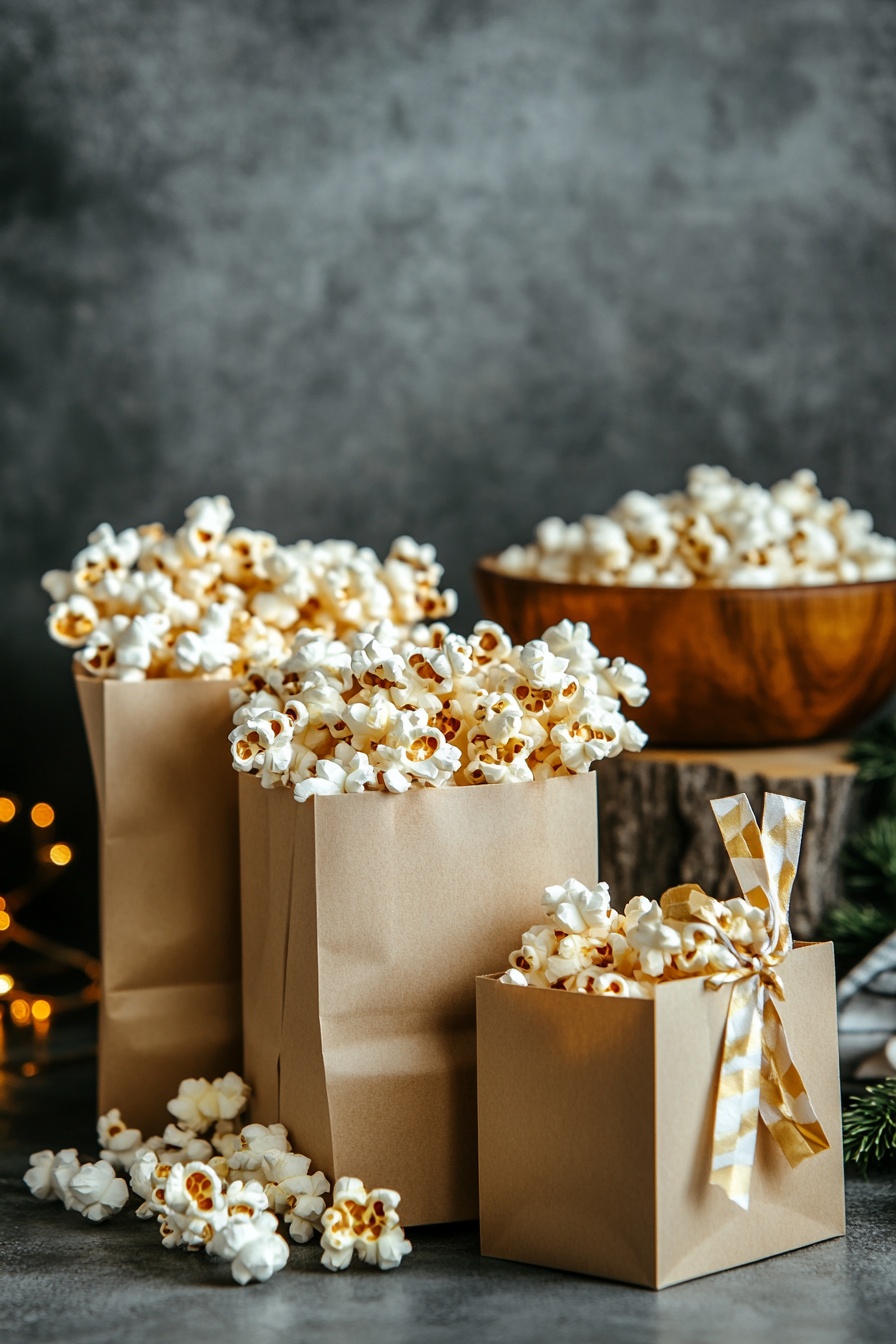
A bag of freshly made gourmet popcorn is the perfect blend of simple and special. Whether sweet, salty, or savory, this homemade treat is a fun and thoughtful gift, ideal for movie nights, holiday favors, or just a cozy surprise for someone special.
What You’ll Need:
- ½ cup popcorn kernels
- 2 tbsp coconut oil or butter
- ½ tsp sea salt
- Flavor options: caramel drizzle, melted chocolate, cinnamon sugar, or cheese powder
- Kraft paper bags or decorative gift boxes
- Ribbon or twine for finishing touches
Let’s Get Crafting!
- Pop the Perfect Batch: Heat coconut oil or butter in a large pot over medium heat. Add the kernels, cover with a lid, and shake occasionally until popping slows down. Remove from heat and sprinkle with sea salt.
- Add a Flavorful Twist: Toss the popcorn with melted chocolate, caramel drizzle, or a dusting of cinnamon sugar for a delicious upgrade.
- Package It Beautifully: Fill kraft paper bags or small gift boxes with the gourmet popcorn. Fold the tops and secure with twine or ribbon for a festive touch.
- Personalize the Gift: Attach a handwritten tag with a fun note like “Pop, Fizz, Enjoy!” or include a mini seasoning pack for a DIY popcorn experience.
Make It Your Own:
- Mix & Match: Create a sampler set with different popcorn flavors.
- Healthier Option: Use air-popped kernels and lightly season with nutritional yeast for a savory alternative.
- Themed Movie Night Gift: Pair the popcorn with a cozy blanket and a handwritten list of must-watch films.
These homemade gourmet popcorn bags are a delightful, budget-friendly gift that’s full of flavor and personality. Perfect for sharing and snacking!
14. Hand-Painted Ceramic Dish Set

A hand-painted ceramic dish set is a fun and functional way to add personality to any kitchen. Whether decorated with whimsical patterns, animals, or abstract designs, these unique dishes make a perfect gift for housewarmings, birthdays, or just a special handmade surprise.
What You’ll Need:
- Plain ceramic plates or bowls
- Ceramic paint or porcelain paint pens
- Fine-tip paintbrushes
- Stencils or design templates (optional)
- Oven (for setting the paint)
Let’s Get Crafting!
- Plan Your Design: Sketch out a playful theme—pandas, florals, geometric patterns, or anything that fits the recipient’s style. You can also use stencils for a more polished look.
- Paint Your Dishware: Use ceramic paints or paint pens to carefully apply your design. Let each layer dry before adding details for a crisp finish.
- Bake to Set the Design: Once the paint has fully dried, place the dishes in a cold oven. Set the temperature to 350°F (175°C) and bake for 30 minutes. Turn off the oven and let the pieces cool inside to ensure the paint fully sets.
- Finishing Touches: Once cooled, gently hand-wash the dishware before gifting. For best results, advise the recipient to avoid dishwashers to preserve the artwork.
Make It Your Own:
- Personalized Touch: Add names, initials, or meaningful quotes to make each dish one-of-a-kind.
- Mix & Match: Create a set with different but complementary designs for a playful collection.
- Gift Presentation: Stack the plates, wrap them in a fabric cloth, and tie with twine for a rustic and charming gift package.
This hand-painted ceramic dish set is a thoughtful and creative gift that blends artistry with everyday use. It’s a perfect way to turn ordinary kitchenware into something truly special!
15. Homemade Infused Oil & Candy Bottles
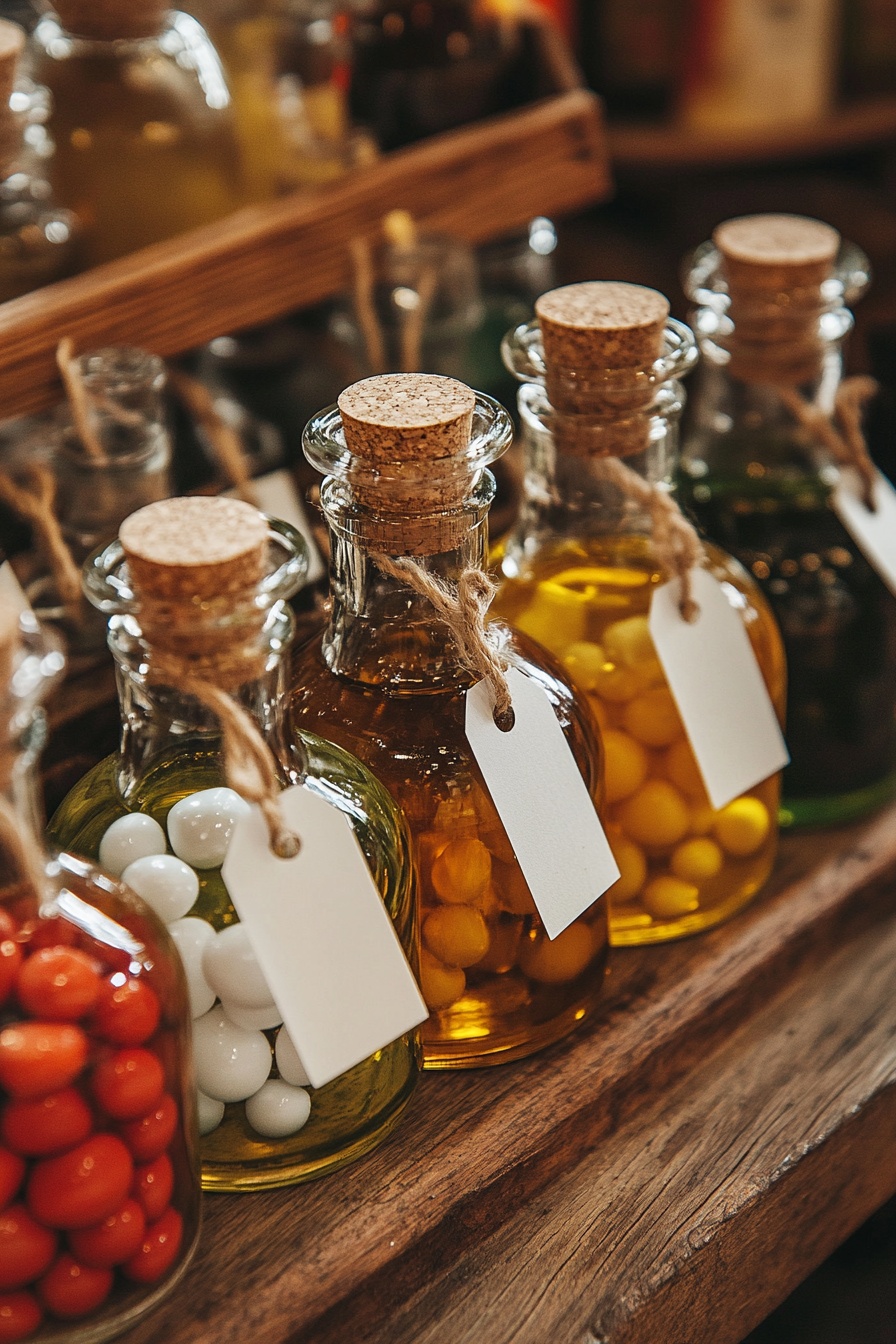
A beautifully crafted bottle of infused oil or colorful candy is the perfect combination of elegance and thoughtfulness. Whether for food lovers, home chefs, or anyone with a sweet tooth, these DIY gifts are simple to make but feel extra special.
What You’ll Need:
- Small glass bottles with cork stoppers
- Twine or ribbon for decoration
- Blank tags for labeling
For Infused Oils:
- High-quality olive oil
- Fresh herbs (rosemary, thyme, basil)
- Garlic cloves, chili flakes, or citrus peels
For Candy Bottles:
- Assorted gourmet candies (chocolate pearls, coated nuts, or fruit chews)
Let’s Get Crafting!
- Prepare the Bottles: Wash and dry the glass bottles thoroughly.
- Make the Infused Oil: Slightly crush herbs or garlic to release their flavors and place them in the bottle. Pour in olive oil, seal with a cork, and let it infuse for a few days before gifting.
- Fill the Candy Bottles: Simply pour in colorful gourmet candies, layering them for a visually appealing effect.
- Decorate & Label: Tie twine around the bottle necks and attach handwritten labels with a sweet message or flavor description.
Make It Your Own:
- Personalized Tags: Write a fun message like “Handcrafted with Love” or “Sweet Treats Just for You!”
- Spice It Up: Try different infusions like chili-lime oil, vanilla bean sugar, or honey-rosemary syrup.
- Gift Set Idea: Pair with fresh bread, a wooden spoon, or a recipe card for an extra-special presentation.
These homemade infused oil & candy bottles are charming, easy to make, and a truly delightful gift that’s perfect for foodies, dinner hosts, or holiday gifting!
16. Handmade Pressed Flower Cards
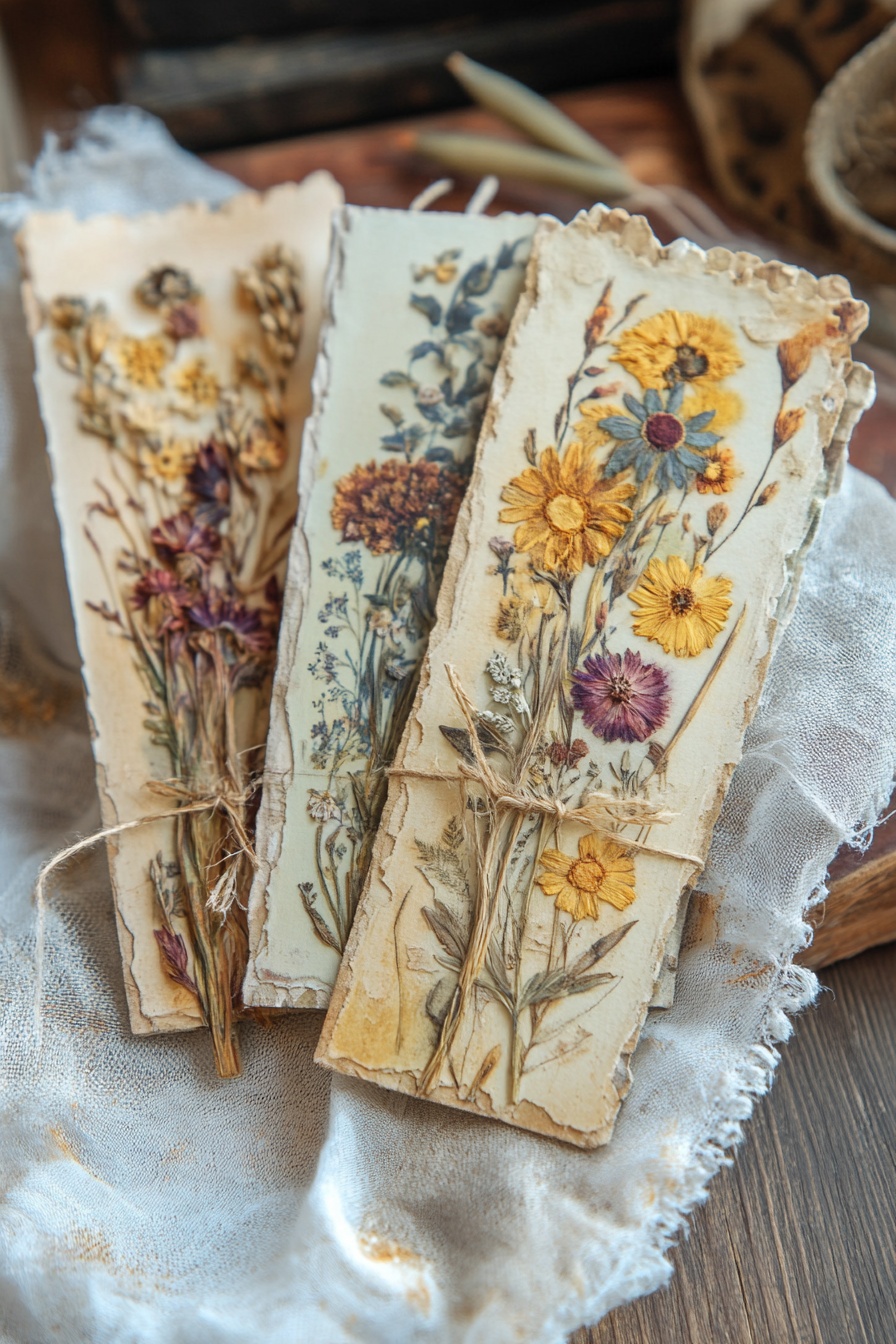
There’s something incredibly special about a handmade card, and these pressed flower cards take it to the next level with a delicate, vintage-inspired charm. Perfect for birthdays, anniversaries, or just a thoughtful note, these beautifully crafted cards turn nature into keepsakes.
What You’ll Need:
- Thick handmade or watercolor paper
- Dried pressed flowers (wildflowers, daisies, lavender, etc.)
- Mod Podge or clear-drying glue
- Twine or ribbon for decoration
- Fine-tip pen or calligraphy ink (optional)
Let’s Get Crafting!
- Prepare the Paper: Tear the edges of the paper slightly for a rustic, handmade feel. Fold it into a card shape or leave it as a flat notecard.
- Arrange the Flowers: Lay out the pressed flowers in a way that complements the card’s shape. Try layering different colors and textures for an artistic touch.
- Glue the Flowers: Apply a thin layer of Mod Podge or glue to secure the flowers without damaging their delicate petals. Let it dry completely.
- Add Personal Touches: Write a heartfelt message, sketch delicate borders, or even use wax seals for an elegant vintage finish.
- Finishing Touches: Tie the card with twine or a small ribbon bundle for a beautifully packaged handmade gift.
Make It Your Own:
- Personalized Messages: Handwrite poetry, meaningful quotes, or a personal note inside.
- Custom Themes: Use seasonal flowers for different occasions—spring florals for birthdays, deep tones for autumnal gifts.
- Gift Pairing: Present the cards with a pressed flower bookmark or a small handwritten letter for an extra special touch.
These handmade pressed flower cards are more than just a note—they’re a piece of art filled with thoughtfulness and care. A timeless keepsake for anyone who appreciates beauty in the little things!
17. Homemade Rose Sugar Scrub
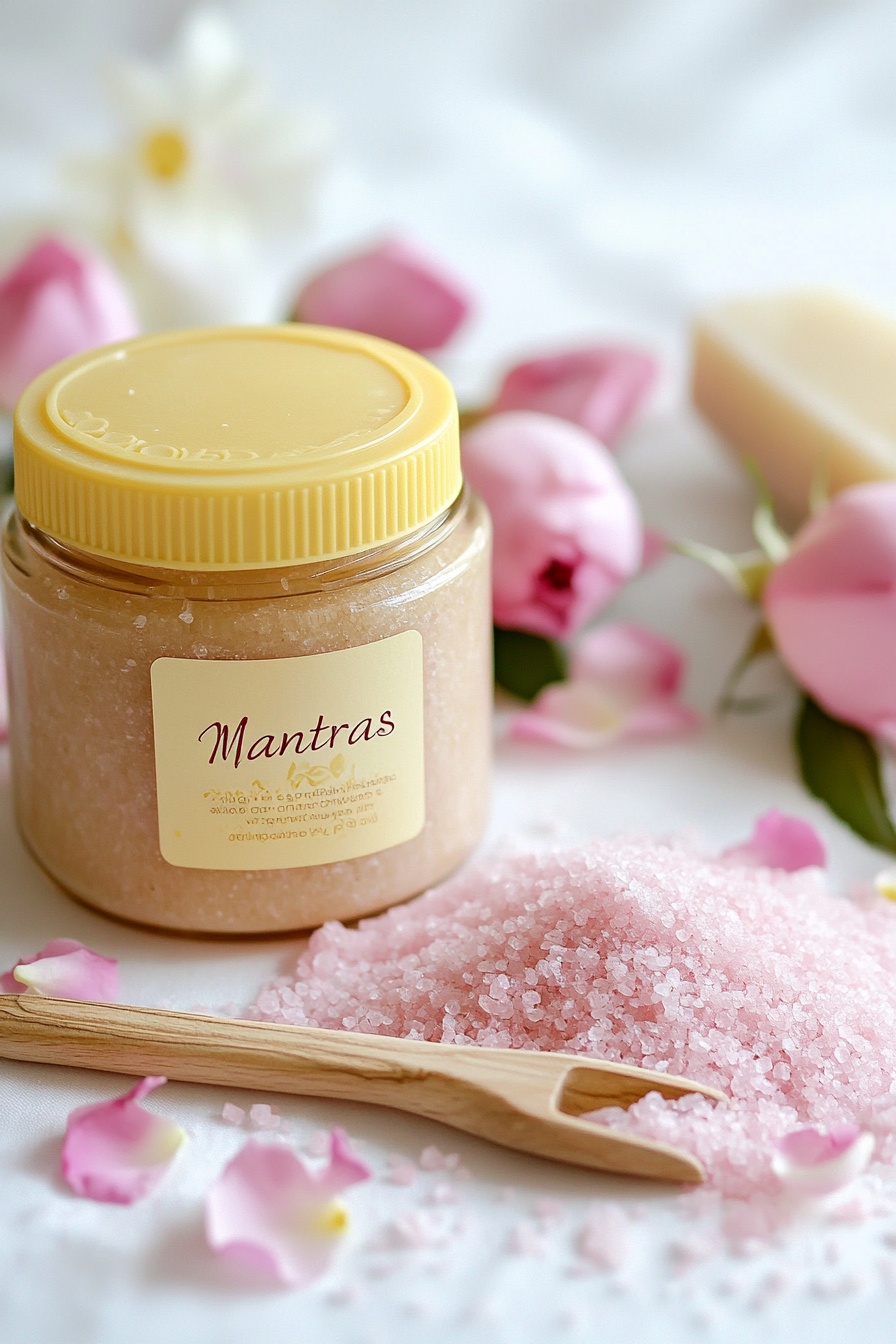
Pamper someone special with a beautifully scented homemade rose sugar scrub! This all-natural exfoliating scrub is perfect for self-care, leaving skin soft, hydrated, and glowing. With its delicate floral fragrance and gentle texture, it makes a luxurious handmade gift for birthdays, spa days, or just because.
What You’ll Need:
- 1 cup fine pink Himalayan salt or sugar
- ½ cup coconut oil or sweet almond oil
- 10 drops rose essential oil
- 1 tbsp dried rose petals (optional)
- Small jar with a lid
- Wooden spoon or scoop (for gifting)
Let’s Get Crafting!
- Mix the Base: In a bowl, combine the sugar or salt with melted coconut oil until well blended.
- Add the Scent: Stir in rose essential oil and dried rose petals for a beautiful floral touch.
- Package It Up: Transfer the scrub into a small jar, securing the lid tightly. Wipe the edges to keep it neat.
- Finishing Touches: Tie a ribbon around the jar and attach a small tag with instructions for use. Include a wooden spoon for easy application.
Make It Your Own:
- Customize the Scent: Swap rose essential oil for lavender, vanilla, or citrus for a different aromatic experience.
- Add Extra Hydration: Mix in a teaspoon of vitamin E oil for added skin benefits.
- Gift Set Idea: Pair with a handmade candle or bath salts for the ultimate spa-inspired gift.
This homemade rose sugar scrub is a thoughtful, elegant, and practical gift that brings a touch of luxury to any skincare routine. Perfect for anyone who deserves a little relaxation and self-care!
18. Homemade Dried Herb Jar
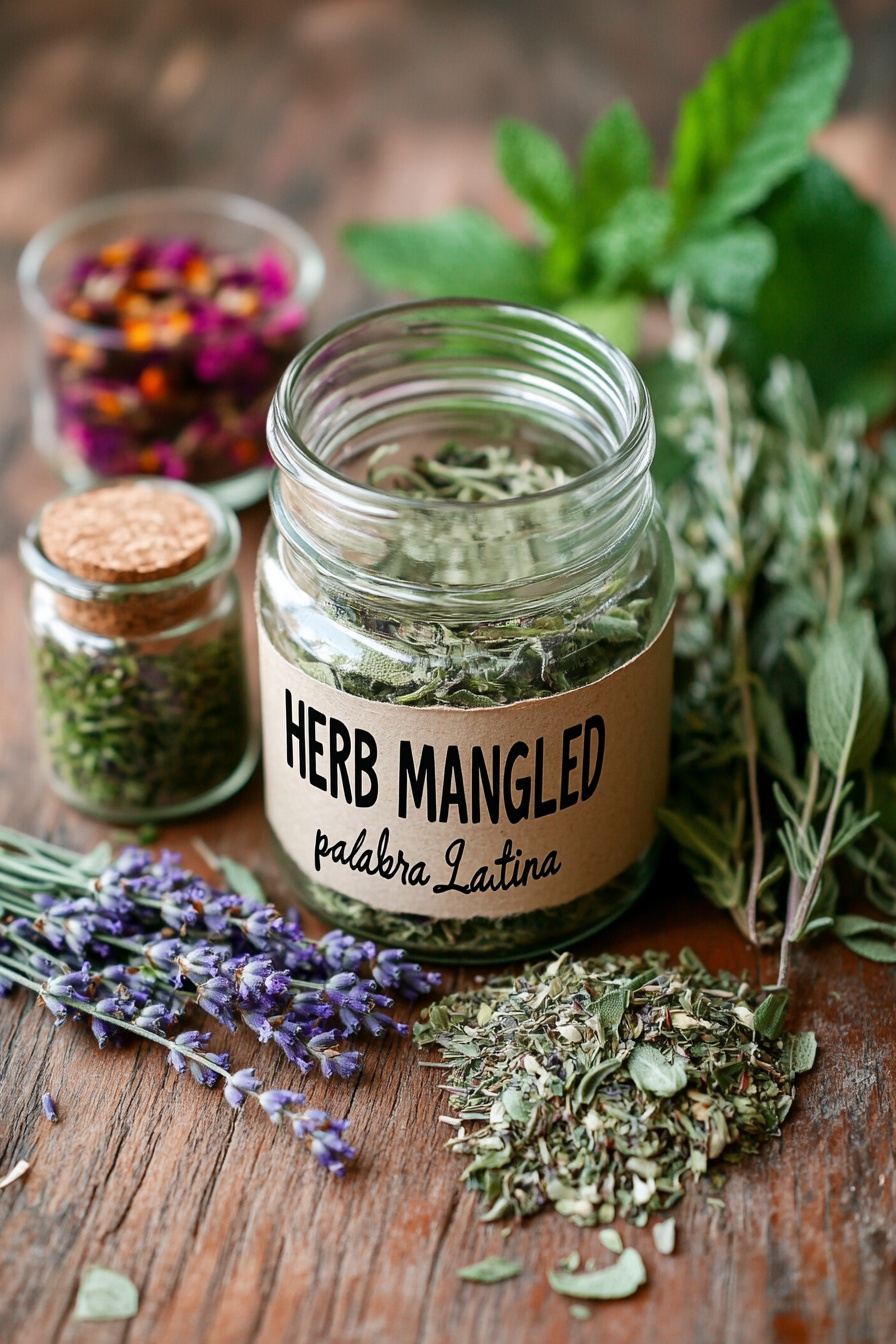
A handcrafted dried herb blend is a simple yet thoughtful gift for food lovers, home chefs, or anyone who enjoys cooking with fresh flavors. With a mix of aromatic herbs, this homemade jar adds a gourmet touch to any dish, making it perfect for seasoning meats, soups, or salads.
What You’ll Need:
- Dried herbs (oregano, thyme, rosemary, sage, basil, or lavender)
- Glass jar with an airtight lid
- Kraft paper or decorative label
- Twine or ribbon for wrapping
Let’s Get Crafting!
- Choose Your Blend: Select a mix of herbs based on your recipient’s favorite flavors. You can create an Italian seasoning, herbal tea mix, or a floral-infused spice blend.
- Prepare the Herbs: Crush or finely chop the dried herbs to release their aroma and make blending easier.
- Fill the Jar: Layer or mix the herbs inside the jar, leaving some space at the top to shake before use.
- Label & Decorate: Write the name of the herb mix on kraft paper or a sticker label. Tie twine or ribbon around the jar for a rustic touch.
Make It Your Own:
- Custom Blends: Create a barbecue rub, herbal tea infusion, or Mediterranean spice mix.
- Add a Personal Touch: Include a small recipe card with ideas on how to use the herbs.
- Gift Pairing: Package with a wooden spoon, olive oil, or a mortar and pestle for a complete gourmet set.
This homemade dried herb jar is a fragrant and practical gift that brings a personal, handcrafted touch to the kitchen. Perfect for anyone who loves to cook or appreciates natural flavors!
19. Homemade Herbal Bath Salts

Give the gift of relaxation with these beautifully scented herbal bath salts. Made with natural ingredients, this DIY spa essential is perfect for unwinding after a long day, making it an ideal handmade present for birthdays, holidays, or self-care moments.
What You’ll Need:
- 1 cup Epsom salt
- ½ cup sea salt or Himalayan pink salt
- 1 tbsp baking soda (softens skin)
- 10–15 drops essential oil (rosemary, eucalyptus, or lavender)
- 1 tbsp dried herbs (rosemary, chamomile, or mint)
- Natural food coloring (optional)
- Small glass jars with lids
Let’s Get Crafting!
- Mix the Base: In a bowl, combine Epsom salt, sea salt, and baking soda. Stir well to blend evenly.
- Infuse with Fragrance: Add a few drops of essential oil and mix until the scent is fully incorporated.
- Add Color & Herbs: If desired, add a drop of natural food coloring for a soft hue, then stir in dried herbs for a natural, spa-like look.
- Package Beautifully: Transfer the mixture into glass jars, sealing tightly to preserve freshness.
- Finishing Touches: Tie a ribbon around the jar and attach a small label with instructions for use.
Make It Your Own:
- Soothing Blend: Try lavender and chamomile for a calming bath soak.
- Energizing Option: Use citrus and mint essential oils for a refreshing spa experience.
- Gift Set Idea: Pair with a handmade candle or a wooden scoop for an elegant self-care package.
These homemade herbal bath salts are a simple yet luxurious gift that brings a spa-like experience right into the home. A perfect way to encourage relaxation and self-care!
20. Hand-Embroidered Linen Napkins
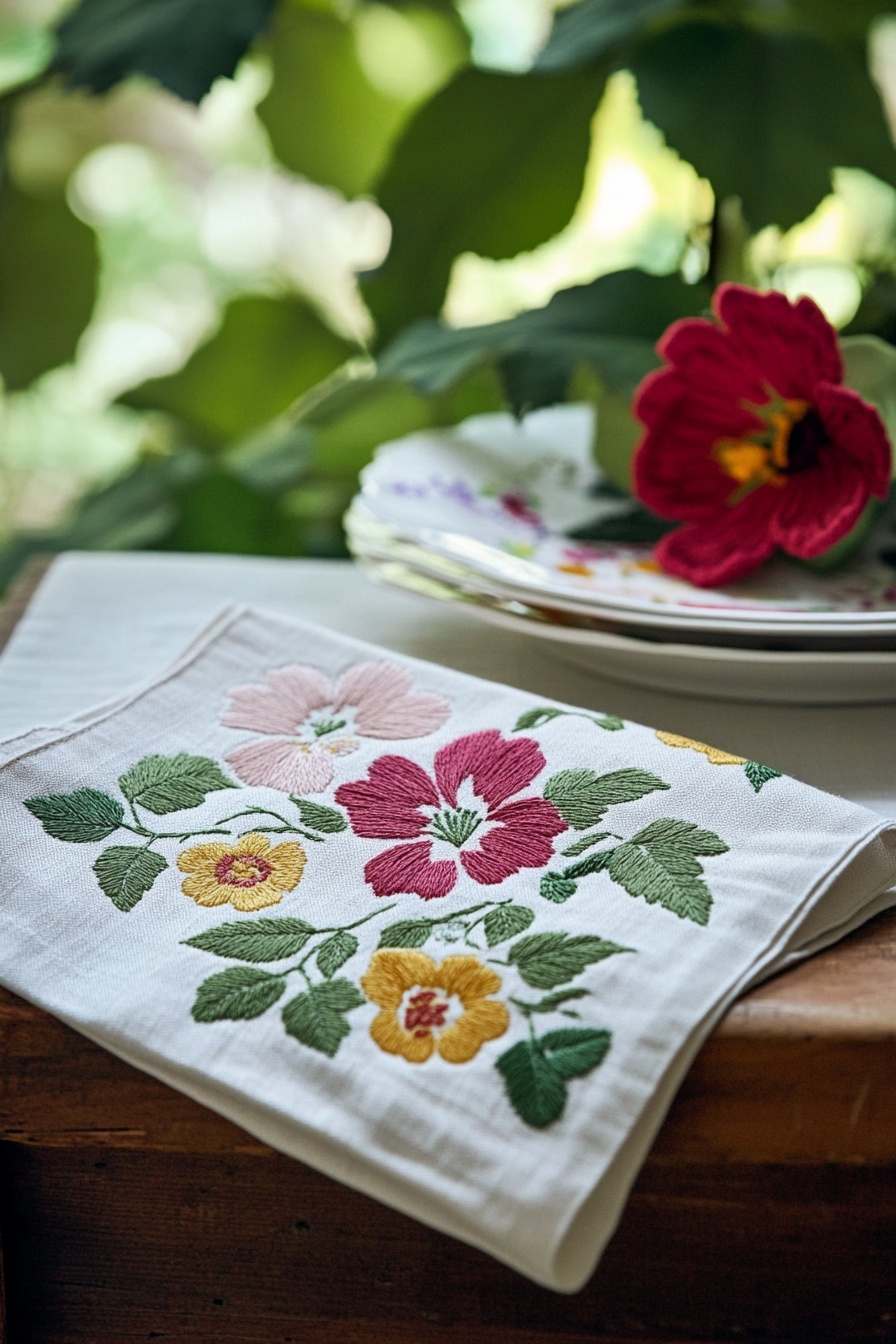
Hand-embroidered linen napkins are the perfect blend of beauty and craftsmanship, making them a thoughtful gift for weddings, housewarmings, or anyone who loves a touch of handmade elegance at their table. With delicate floral embroidery, they bring charm and personality to any dining setting.
What You’ll Need:
- Plain linen or cotton napkins
- Embroidery hoop
- Embroidery floss (assorted colors)
- Embroidery needle
- Fabric pencil or washable marker (for sketching design)
Let’s Get Crafting!
- Choose Your Design: Sketch a floral pattern, monogram, or delicate vines onto the fabric using a washable fabric marker.
- Prepare the Fabric: Stretch the napkin in an embroidery hoop to keep it taut while stitching.
- Start Stitching: Use basic embroidery stitches like satin stitch for petals, backstitch for outlines, and French knots for decorative accents.
- Finish & Secure: Once complete, gently wash off any fabric markings and press with an iron on low heat.
- Final Touches: Fold neatly and package with a ribbon or small note explaining the handmade details.
Make It Your Own:
- Personalized Designs: Add initials or meaningful symbols for a customized touch.
- Themed Sets: Create a seasonal collection with different flowers for spring, summer, or autumn.
- Gift Pairing: Bundle with a set of vintage-style plates or handmade ceramic cups for a complete gift.
These hand-embroidered linen napkins are a timeless and elegant gift that brings warmth and artistry to any table. A truly special handmade treasure!
21. Handmade Textured Throw Pillow
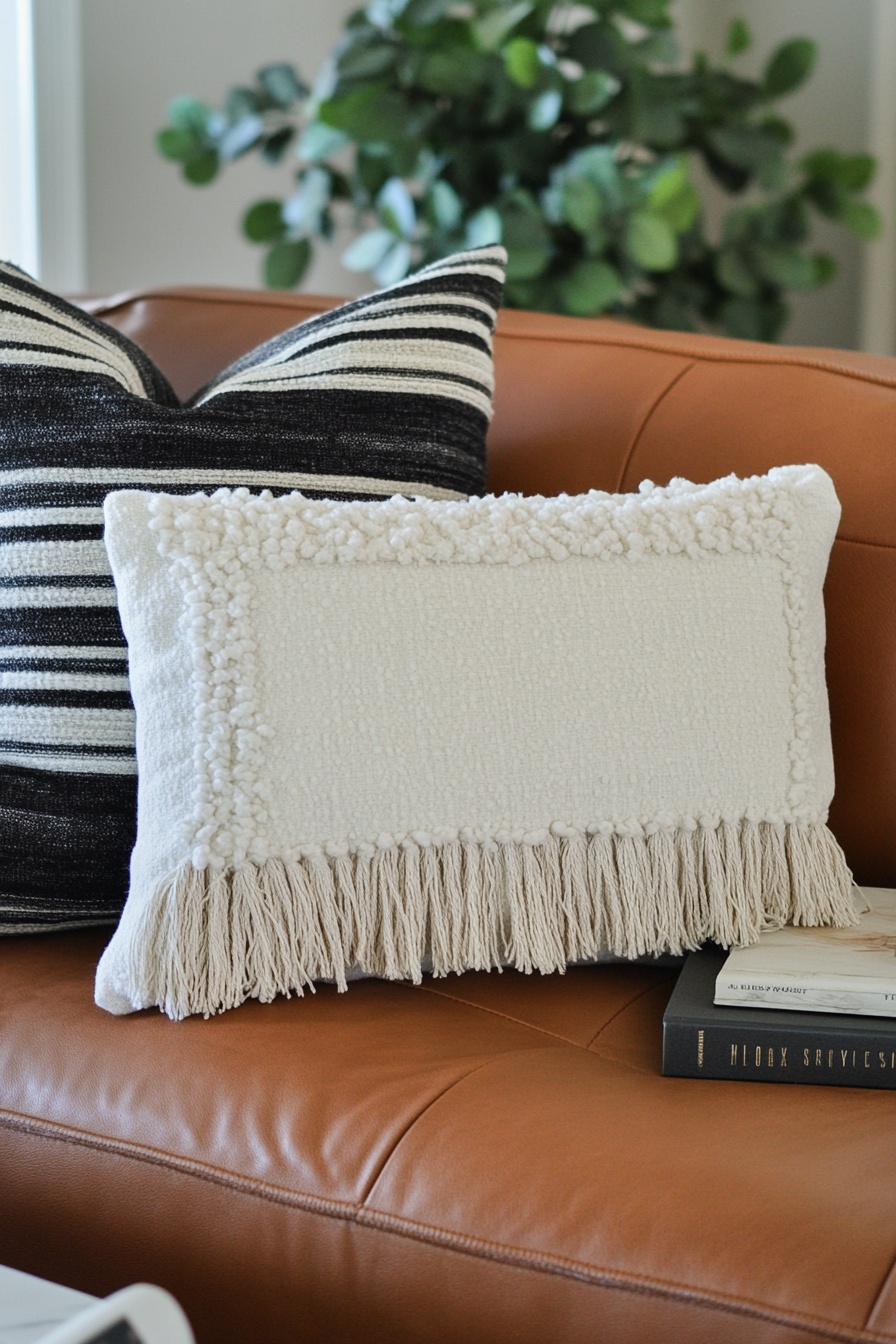
A handmade throw pillow adds warmth and texture to any space, making it the perfect gift for home décor lovers. This DIY pillow with woven details and fringe accents brings a cozy, bohemian charm to sofas, beds, or reading nooks.
What You’ll Need:
- Soft fabric (cotton, linen, or boucle)
- Matching thread
- Yarn for tassels or fringe
- Pillow insert or stuffing
- Sewing machine or needle and thread
- Fabric glue (optional for no-sew method)
Let’s Get Crafting!
- Cut the Fabric: Measure and cut two identical rectangles of fabric, slightly larger than your pillow insert.
- Add Texture: Sew or glue a strip of woven trim or textured fabric to the front piece for a stylish touch.
- Create the Fringe: Cut yarn into equal lengths and attach along the bottom edge, securing with fabric glue or stitching for durability.
- Assemble the Pillow: Place both fabric pieces together (right sides facing in) and sew around three edges, leaving an opening. Turn it right side out and insert the pillow stuffing.
- Finishing Touches: Stitch the open edge closed or use a hidden zipper for easy removal.
Make It Your Own:
- Boho Vibes: Use macramé fringe or pom-pom trim for a unique look.
- Minimalist Chic: Keep it monochrome with neutral tones for a modern aesthetic.
- Gift Pairing: Pair with a cozy throw blanket or scented candle for a complete home gift set.
This handmade textured throw pillow is a stylish and thoughtful gift that adds instant charm and comfort to any home. A perfect way to bring warmth and personality to someone’s living space!
22. Handmade Braided Friendship Bracelets
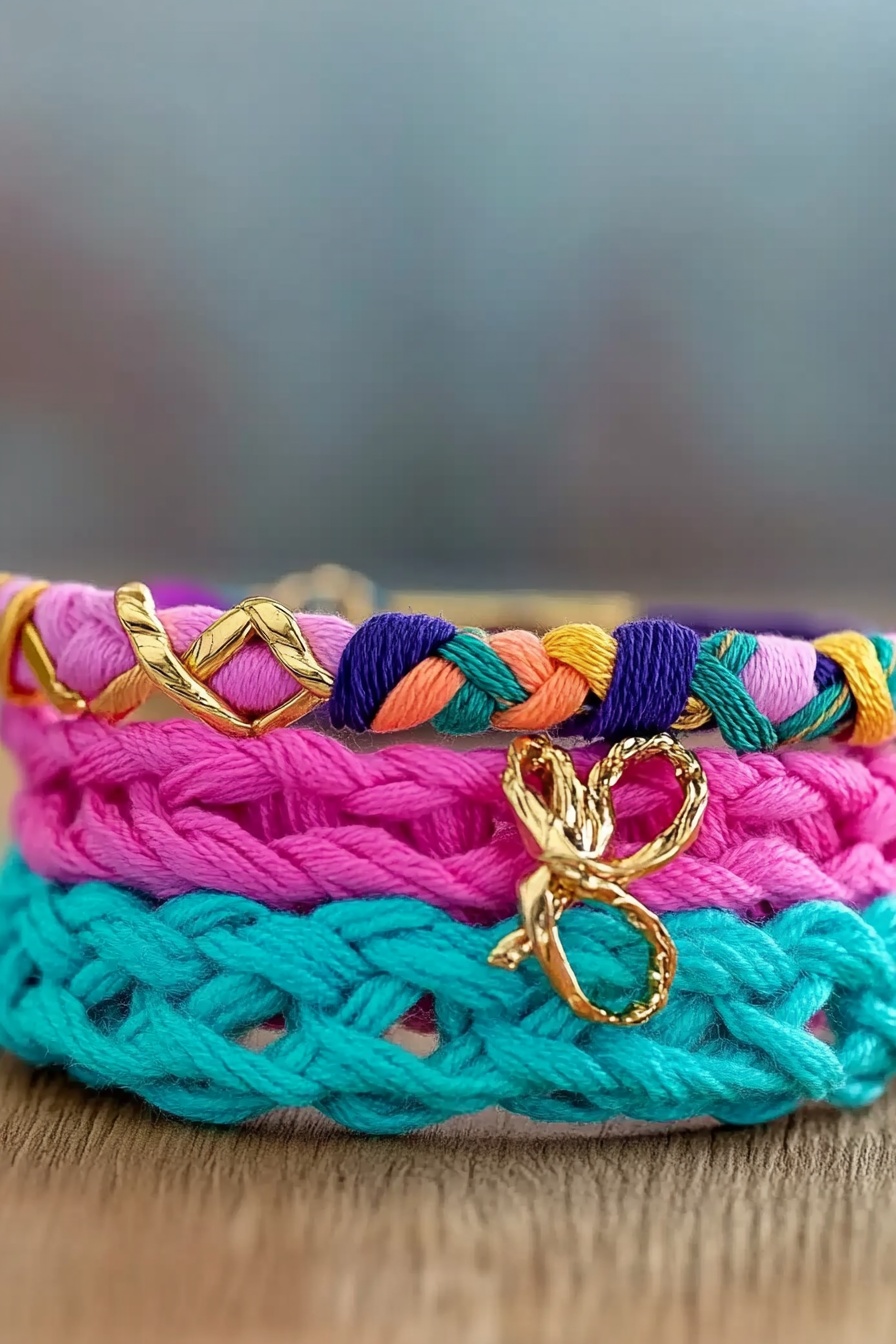
Nothing beats a handmade friendship bracelet to show someone you care! These vibrant, braided bracelets are easy to make, stylish, and full of personality. Whether given as a thoughtful gift or a fun accessory, they bring a playful and sentimental touch to any outfit.
What You’ll Need:
- Embroidery floss, yarn, or cotton cord (various colors)
- Gold or silver chain (optional for extra detail)
- Charm or decorative clasp (optional)
- Scissors
- Tape or clipboard (to hold while braiding)
Let’s Get Crafting!
- Choose Your Colors: Pick 3–5 strands of embroidery floss or cotton cord in complementing shades.
- Secure & Braid: Tie a knot at the top and tape it down or clip it to a surface. Braid the strands tightly, adding a gold chain if desired for an extra accent.
- Add a Charm (Optional): Attach a small charm in the center or at the end for a personalized touch.
- Finish the Bracelet: Tie a secure knot at the end and either leave it adjustable or attach a decorative clasp for easy wear.
- Finishing Touches: Trim any excess thread and check for evenness before gifting.
Make It Your Own:
- Mix Textures: Combine soft yarn, silky embroidery floss, and metallic chains for a trendy contrast.
- Layered Look: Create multiple bracelets in different colors and stack them together.
- Gift Pairing: Present them in a small fabric pouch or attach a note with a heartfelt message.
These handmade braided friendship bracelets are a stylish, fun, and meaningful gift that anyone would love to wear. Perfect for best friends, siblings, or as a DIY accessory for yourself!
23. Hand-Painted Ocean Resin Coasters
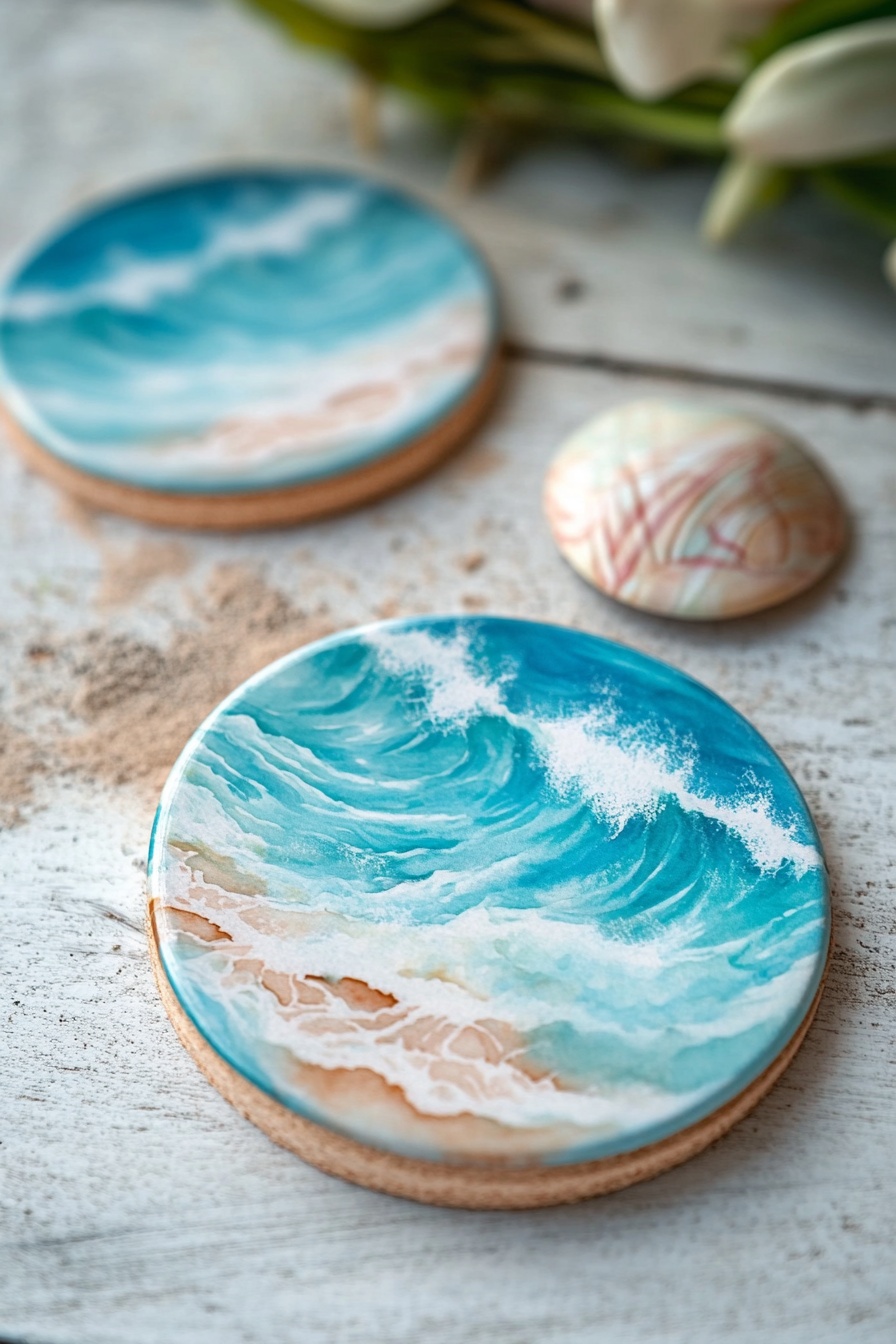
Bring a piece of the beach into any home with these breathtaking ocean-inspired resin coasters! With swirling blue waves and sandy textures, they make the perfect handmade gift for ocean lovers, housewarmings, or anyone who enjoys unique décor.
What You’ll Need:
- Round wooden or ceramic coasters
- Epoxy resin
- Acrylic paints (blue, white, sand tones)
- Mixing cups & stir sticks
- Heat gun or blow dryer (for wave effects)
- Painter’s tape (optional for clean edges)
- Cork backing (for added grip)
Let’s Get Crafting!
- Prep the Coasters: Tape the edges (if needed) and ensure they’re clean and dry.
- Mix the Resin: Prepare the epoxy resin according to package instructions, dividing it into small cups for each color.
- Create the Ocean Effect: Pour blue and sand-colored resin onto the coasters. Use a stir stick to blend softly, creating a shoreline look.
- Make the Waves: Add white resin for the waves and use a heat gun or blow dryer to gently push the color, forming realistic foam effects.
- Let It Cure: Allow the resin to fully set for 24–48 hours in a dust-free area.
- Finishing Touches: Attach cork backing for extra durability and smooth the edges if needed.
Make It Your Own:
- Customize the Colors: Try deep blue for a tropical vibe or add gold flakes for an elegant touch.
- Add Personalization: Write initials or small quotes before sealing with resin.
- Gift Pairing: Package with a matching resin tray or beach-themed candle for a complete set.
These hand-painted ocean resin coasters are more than just practical—they’re a mini work of art that brings coastal beauty to any space. Perfect for adding a beachy, serene touch to any home!